Making miniature food using air-dry clay is a fun and relaxing craft that anyone can learn. You can create tiny cakes, cookies, bread, and sweets that look realistic and cute. This art does not need expensive tools or an oven, which makes it perfect for beginners. With a little patience and practice, you can achieve beautiful results.
Discover these tools—they will help you hone your talent and unlock your full potential
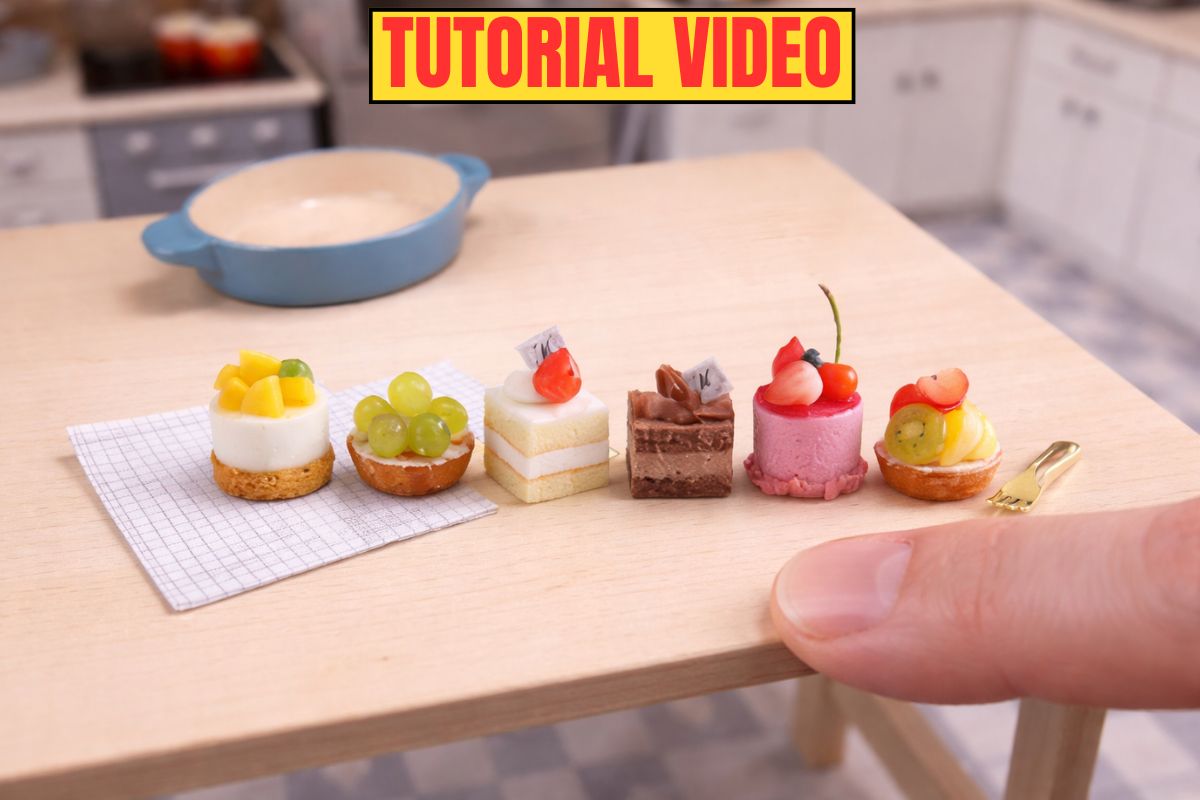
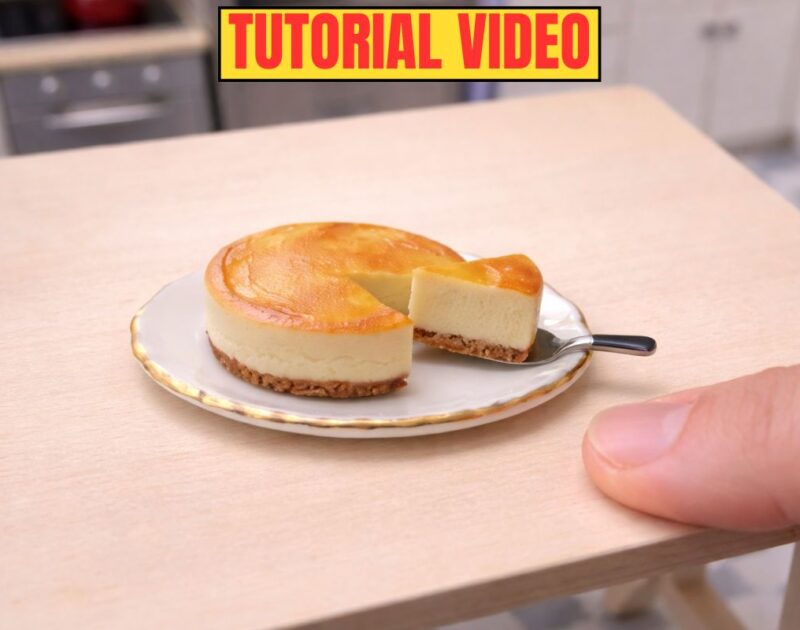
Miniature food art has become very popular thanks to social media. Many artists share videos showing how they make tiny foods step by step. These videos help beginners learn new techniques and understand how details are made.
Watching a miniature food maker is also inspiring and helps you feel confident to try it yourself. In this project, I will include a video from a miniature food creator to make learning easier.
Choosing the Right Air-Dry Clay
For beginners, lightweight air-dry clay is the best choice. It is soft, easy to shape, and dries smoothly. Fine-texture clay works well for small details like cake layers and cream decorations. Before you start, knead the clay with your hands until it becomes soft and smooth. This removes air bubbles and helps prevent cracks later.
Shaping Miniature Cakes and Bread
You do not need many tools to shape miniature food. Simple tools like toothpicks, needles, small knives, and brushes are enough. Cakes can be made by forming small round shapes and stacking thin layers.
Bread and cookies can be shaped by hand. To add texture, you can gently press a sponge or toothbrush on the surface. Take your time and work slowly—small details make a big difference.
Letting the Clay Dry Properly
Air-dry clay dries naturally, without baking. After shaping your miniature food, place it on a flat surface and let it dry at room temperature. Small pieces usually need 24 to 48 hours to dry completely. Try to turn the pieces after several hours so they dry evenly. Do not use a hair dryer or place them in the sun, as this can cause cracks.
How to Avoid Cracks
Cracks are common for beginners, but they are easy to avoid. Do not add too much water while working. The clay should be soft, not wet. If you are not finished, cover your piece with plastic wrap to keep it from drying too fast. If small cracks appear, you can fix them by gently adding a little soft clay before the piece is fully dry.
Adding a Final Protective Layer
When your miniature food is completely dry, you can protect it with a clear varnish or acrylic sealer. This helps keep the piece clean and strong. Gloss varnish is great for cakes and desserts because it makes them look fresh and shiny. Matte varnish works well for bread and baked goods. Apply a thin layer and let it dry fully.
Note: In this project, I will include a video from a professional miniature food artist. This video will help beginners understand the steps more clearly, learn shaping techniques, and see how small details are made in real time. Watching an experienced creator makes learning easier and more enjoyable.
Final Thoughts
Making miniature food with air-dry clay is a simple and enjoyable hobby for beginners. You do not need special skills—just practice and creativity. By following basic steps and learning from tutorial videos, you can slowly improve and create beautiful miniature cakes and sweets.