Miniature food making has become one of the most fascinating branches of the dollhouse and crafting world. These tiny creations combine artistic skill, patience, and technical precision to produce realistic replicas of real meals in a very small scale.
| Product | Buy |
|---|---|
| Air Dry Clay |

|
| Clay Tools |
|
| Clay Shaper Tool |
|
| Magnets |
|
| Jewellery Materials |
|
| Acrylic Colours |
|
| Paint Brushes |
|
Whether you create miniature bread, fruits, desserts, or full dollhouse meals, mastering certain core techniques will dramatically improve the realism and quality of your work. Below are six essential techniques every miniature food artist should learn to truly excel in this craft.
1. Understanding Scale and Proportion
The first and most important technique is learning how to work accurately in scale. Miniature food typically follows common dollhouse scales such as 1:12, 1:24, or 1:48. Without correct proportions, even beautifully crafted pieces can look unrealistic.
To master scale, study real food sizes and convert them into miniature measurements. For example, a standard loaf of bread in 1:12 scale should be about one-twelfth of its real size. Using rulers, calipers, or printable scale guides can help ensure accuracy. Over time, your eye will become trained to recognize correct proportions automatically, which is essential for professional-looking results.
2. Mixing Realistic Colors
Color plays a crucial role in miniature food realism. Real food rarely has flat or uniform colors — bread crusts have warm gradients, fruits show subtle variations, and cooked dishes often contain layered tones.
Learning to mix colors carefully is a vital skill, especially when working with polymer clay, resin, or paint. Instead of using colors straight from the package, practice blending small amounts to create natural shades. For example, bread should include hints of beige, brown, and even tiny touches of yellow. Cakes and pastries benefit from gentle shading rather than bright artificial colors.
Observing real food under natural light and trying to replicate those tones will greatly improve your results.
3. Creating Realistic Textures
Texture is what makes miniature food believable. Smooth surfaces alone rarely look convincing; instead, tiny imperfections bring life to your creations.
There are many ways to create texture. You can use toothbrushes, needles, aluminum foil, or textured sponges to mimic bread crusts, sponge cakes, or fried foods. For fruits and vegetables, gently pressing tools into the clay can create natural skin effects.
Layering materials also helps. For example, adding powdered pastel dust to baked items can simulate flour or toasted surfaces. Practicing texture techniques on scrap material first allows you to experiment without ruining your main project.
4. Mastering Layering and Assembly
Most miniature foods are not made in a single piece. Cakes, sandwiches, burgers, and layered desserts require assembling multiple components.
Learning how to build food in layers is essential. Start by constructing the base, then add fillings, toppings, or decorations step by step. This technique gives depth and realism that cannot be achieved with a single molded shape.
For example, a miniature sandwich should have separate bread slices, fillings, and slight irregularity between layers. Using small amounts of liquid clay, resin, or glue can help secure pieces while maintaining a natural appearance.
Patience is key here — rushing assembly often leads to messy or unrealistic results.
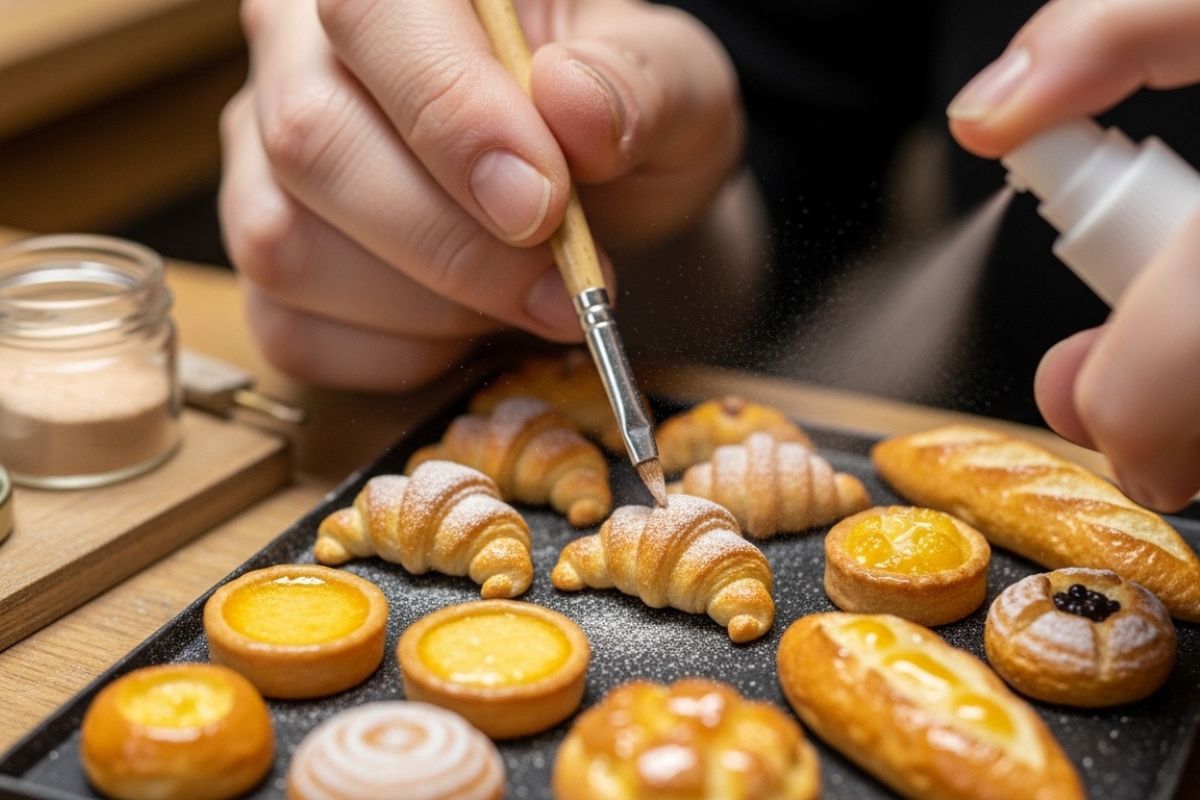
5. Baking and Finishing Techniques
For artists who use polymer clay, understanding proper baking is critical. Incorrect temperature or time can ruin colors, cause cracks, or weaken the piece.
Always follow manufacturer instructions and use an oven thermometer to ensure accuracy. Baking in stages can be helpful when creating complex pieces. For example, bake the base first, then add delicate toppings afterward and bake again.
Finishing techniques are just as important. Matte varnish can simulate baked surfaces, while glossy varnish works well for sauces, fruits, or glazes. Dry brushing, pastel dusting, and light painting can add depth and make details stand out.
A good finish transforms a simple miniature into a professional artwork.
6. Studying Real Food and Practicing Observation
Perhaps the most overlooked technique is careful observation. The best miniature food artists spend time studying real dishes before recreating them.
Look closely at how a croissant folds, how cheese melts, or how fruit slices reflect light. Notice imperfections — uneven crusts, irregular cuts, crumbs, and texture changes. These small details are what make miniatures convincing.
Taking reference photos or even sketching the food beforehand can help you plan your miniature more accurately. Observation trains your brain to notice details you might otherwise miss, which dramatically improves your craftsmanship.
Final Thoughts
Mastering miniature food making is not just about talent — it is about learning and practicing the right techniques. By understanding scale, mixing realistic colors, creating convincing textures, layering components, mastering baking and finishing, and carefully observing real food, you can transform your miniatures from simple crafts into highly realistic works of art.
Like any skill, improvement comes with practice. Start with simple foods, experiment with different materials, and do not be afraid to make mistakes. Every attempt teaches you something new. With time and dedication, you will develop your own style and techniques, bringing your tiny culinary creations to life in remarkable detail.