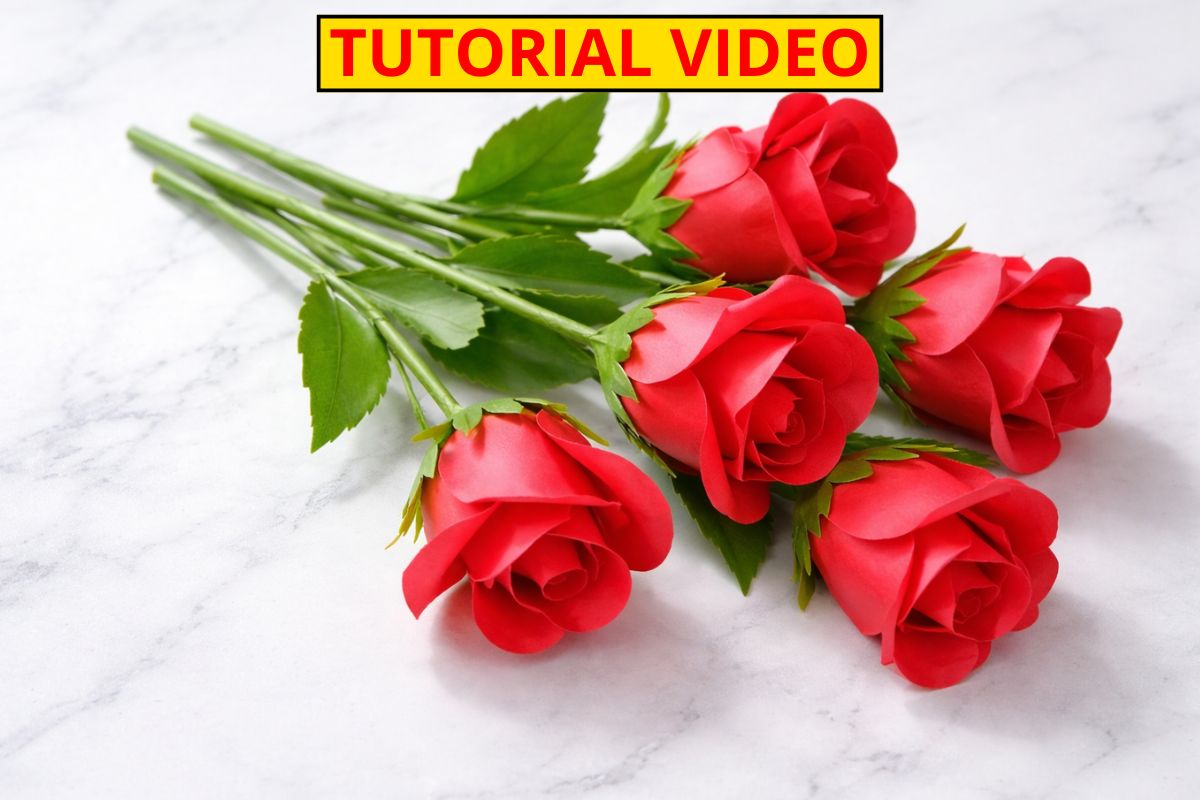
Handmade paper roses are one of the most charming and rewarding crafts you can create. Whether you’re decorating a miniature scene, making a romantic gift, or adding elegance to a DIY project, a well-crafted paper rose can look surprisingly realistic.
The difference between an average result and a stunning one often comes down to technique and attention to detail. These six practical tips will help you improve your paper rose skills and achieve professional-looking results.
1. Choose the Right Paper
Not all paper behaves the same way when shaping petals. Thin, flexible paper such as crepe paper, tissue paper, or lightweight cardstock works best because it bends easily without cracking.
If you want soft, natural-looking petals, crepe paper is an excellent choice due to its stretch and texture. For sharper, more defined roses, lightweight cardstock can give you cleaner edges. Avoid very thick paper, as it can make the rose look stiff and unrealistic.
Pro tip: Test a small piece first—if it curves smoothly between your fingers, it’s suitable.
2. Cut Petals with Natural Variation
Real roses are never perfectly identical, and your paper rose shouldn’t be either. When cutting petals, slightly vary the size and shape. This small detail dramatically improves realism.
Instead of cutting all petals in one exact template:
- Make some slightly wider
- Make some slightly taller
- Round the edges gently
This variation helps the finished flower look organic rather than mechanical.
Pro tip: Cut petals in batches but trim a few individually for a more natural effect.
3. Shape the Petals Before Assembly
One of the biggest mistakes beginners make is assembling flat petals. Shaping each petal beforehand gives your rose depth and life.
You can shape petals by:
- Curling edges around a toothpick or thin brush
- Gently stretching crepe paper in the center
- Rolling the top edges outward
This step creates the soft, blooming look that makes paper roses convincing.
Pro tip: Use your fingers for subtle shaping—body warmth helps soften the paper fibers.
4. Build the Rose Center Tightly
The center of the rose sets the foundation for the entire flower. Start with a small, tightly rolled bud. This core should be compact and neat because loose centers make the flower look messy.
When wrapping the first few petals:
- Keep them snug around the bud
- Angle them slightly upward
- Overlap each petal naturally
As you move outward, gradually loosen the petals to mimic how real roses open.
Pro tip: Think “tight center, loose outer bloom.”
5. Use Glue Sparingly and Precisely
Too much glue is one of the fastest ways to ruin a delicate paper rose. Excess glue creates wrinkles, shine spots, and bulky edges.
Apply glue in very small amounts using:
- A toothpick
- A precision glue bottle
- A fine brush
Focus the glue only at the base of each petal rather than spreading it across the entire surface.
Pro tip: Quick-drying tacky glue or clear craft glue usually works better than very watery white glue.
6. Finish with Realistic Details
The final touches are what transform a simple craft into a professional-looking handmade rose. Small enhancements can make a huge difference.
Consider adding:
- Soft ink shading on petal edges
- A green paper calyx under the flower
- A wrapped floral wire stem
- Gentle outward bending of outer petals
Even lightly dusting the edges with pastel chalk can add depth and realism.
Pro tip: Step back and look at your rose from different angles before calling it finished.
I found a creator who seems very professional—you can watch the video for helpful ideas. Seeing how experienced makers shape and assemble their paper roses can give you new inspiration and improve your technique.
Final Thoughts
Creating a beautiful handmade paper rose is a skill that improves with practice and patience. Focus on good materials, natural petal shaping, and careful assembly. Remember that realism comes from small imperfections and thoughtful details, not perfection.
Start simple, refine your technique, and soon your paper roses will look elegant enough for miniature scenes, gifts, decorations, or craft displays. With these six tips, you’re well on your way to crafting roses that truly bloom on paper. 🌹