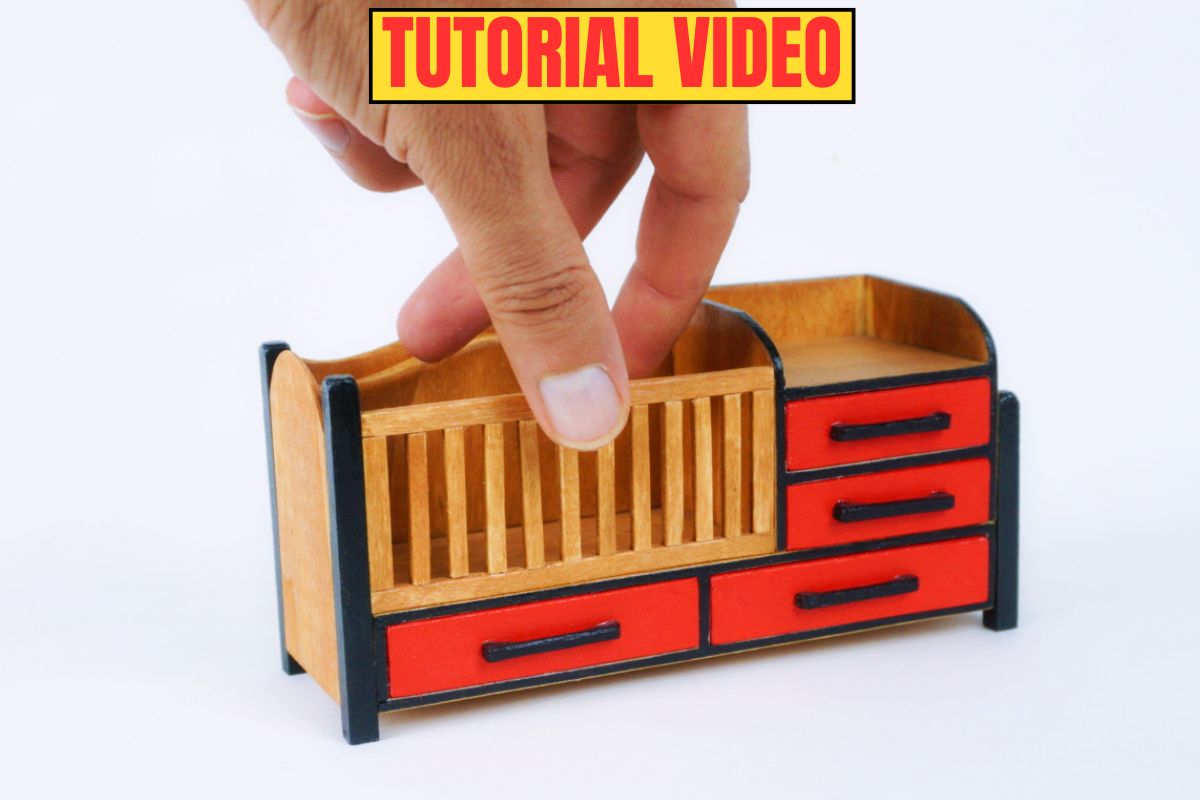
Creating miniature furniture is a rewarding craft that combines precision, patience, and creativity. Among the most charming pieces to construct is a baby crib in 1:12 scale, perfect for dollhouses or miniature collections.
This detailed guide will walk you through the process of building a beautiful wooden miniature crib that captures all the elegance of its full-sized counterpart.
I rely on a set of trusted tools that help achieve professional-looking results in miniature woodworking:
- Sandpaper – to smooth edges and prepare surfaces.
- Transparent brown stain – to bring out the natural beauty of the wood grain.
- Wood oil – to protect and enhance the finish.
- Jeweler’s saw – for delicate and precise cuts.
- Small table saw – to speed up straight cuts.
- 12V mini sander – for quick, clean smoothing.
Essential Materials and Tools
The foundation of any successful miniature project lies in selecting the right materials. For this baby crib, 3mm wood serves as the ideal choice due to its manageable thickness and ease of cutting. This thin wood allows for delicate, precise work while maintaining structural integrity. The material is forgiving for beginners yet versatile enough for experienced crafters to achieve professional results.
Beyond the wood itself, you’ll need water-based varnish to protect and enhance the natural beauty of the timber. A distinctive red color paint will be used specifically for the drawers, adding a charming pop of color that makes the piece more visually interesting and authentic to traditional nursery furniture designs.
The Jewel Saw: Your Precision Cutting Companion
One tool stands out as absolutely essential in this project: the jewel saw. This remarkable instrument plays a crucial role in cutting the curved elements that give the crib its characteristic shape and appeal. Unlike straight cuts that can be achieved with various tools, curves demand precision and control that only a jewel saw can provide.
The jewel saw’s fine blade allows you to navigate tight radiuses and intricate patterns with ease. When working with 3mm wood, the saw glides smoothly through the material, creating clean edges that require minimal sanding.
This tool is particularly valuable when crafting the curved headboard and footboard that define the crib’s elegant silhouette. The ability to execute these curves accurately transforms a simple box structure into a piece that truly resembles a miniature baby crib.
Working with 3mm Wood
The choice of 3mm wood thickness strikes the perfect balance for miniature work. This dimension is thin enough to cut easily, even with hand tools, yet substantial enough to provide stability to the finished piece. The wood’s manageability makes it accessible for crafters at various skill levels.
When cutting 3mm wood, you’ll appreciate how responsive it is to your tools. The material doesn’t splinter excessively when properly handled, and it accepts glue readily for strong joints. This thickness also allows for detailed work such as creating spindles, rails, and decorative elements that would be challenging with thicker materials.
Finishing Touches: Varnish and Color
Once the crib is assembled, the finishing process brings the piece to life. Water-based varnish offers several advantages for miniature projects. It dries quickly, has minimal odor, and provides excellent protection without yellowing over time. Apply thin, even coats to achieve a smooth, professional finish that enhances the wood grain.
The red paint for the drawers adds personality and visual interest to the design. This splash of color creates contrast against the natural wood tones and mimics the playful aesthetic often found in children’s furniture. The drawers themselves serve both decorative and functional purposes, adding authenticity to the miniature piece.
Safety First: Handling Sharp Tools
Working with miniature projects requires using various sharp tools, and safety should always be your top priority. The jewel saw, craft knives, and other cutting implements demand respect and careful handling. Always cut away from your body, keep your fingers clear of the blade path, and work in good lighting to see exactly what you’re doing.
Maintain a clean workspace free of clutter to prevent accidents. Keep your tools sharp, as dull blades require more pressure and are more likely to slip. Consider using a cutting mat and securing your work with clamps when possible to ensure stability during cutting operations.
Step-by-Step Video Tutorial
For those who prefer visual learning, a comprehensive video tutorial is available that demonstrates each step of the construction process. This resource provides invaluable guidance, showing techniques for cutting curves, assembling components, and applying finishes. Following along with the video ensures you don’t miss critical details and helps you understand the sequence of operations.

Gratitude to Our Community
To all our followers who continue to support this creative journey, thank you for your enthusiasm and engagement. Your interest in miniature crafting inspires the creation of more detailed tutorials and projects. Your feedback and shared experiences enrich our community and help fellow crafters improve their skills.
Creating a 1:12 scale baby crib is more than just a woodworking project—it’s an exercise in precision, an opportunity to develop new skills, and a chance to create something beautiful that will be treasured for years to come.