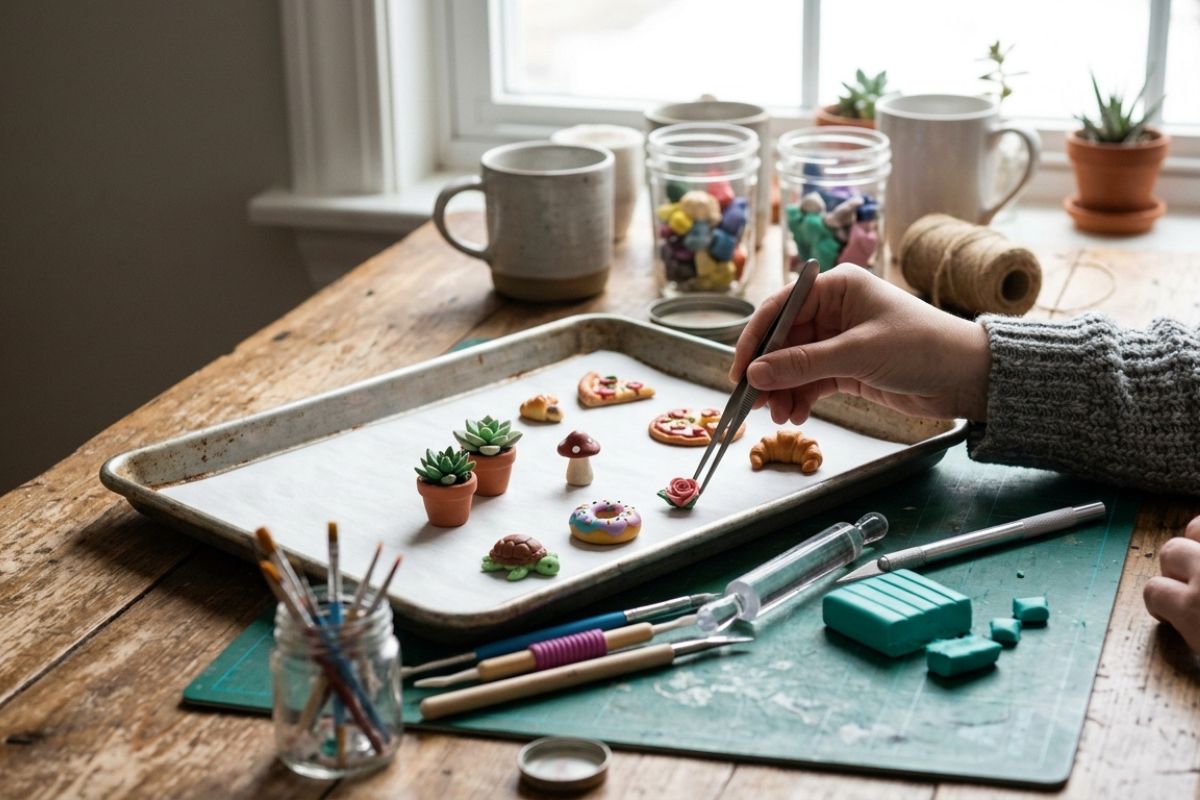
Polymer clay is one of the most popular materials used in DIY crafts, miniature art, jewelry making, and decorative projects. Artists and hobbyists love it because it is easy to shape, comes in many colors, and hardens permanently after baking. However, many beginners struggle with the most important step of the process—baking.
| Product | Buy |
|---|---|
| Air Dry Clay |

|
| Clay Tools |
|
| Clay Shaper Tool |
|
| Magnets |
|
| Jewellery Materials |
|
| Acrylic Colours |
|
| Paint Brushes |
|
If you’re wondering how to bake polymer clay correctly, this guide will walk you through everything you need to know. From choosing the right temperature to avoiding common mistakes, this complete tutorial will help you achieve strong, durable, and professional-looking results every time.
What Is Polymer Clay?
Polymer clay is a synthetic modeling clay made from PVC particles, plasticizers, and pigments. Unlike air-dry clay, polymer clay must be baked in an oven to harden.
Once baked properly, polymer clay becomes:
- Durable
- Lightweight
- Water resistant
- Long-lasting
Because of these qualities, polymer clay is widely used for:
- Jewelry
- Miniature food art
- Keychains
- Magnets
- Figurines
- Home decorations
For artists who love miniature crafts—such as tiny furniture or miniature food—learning how to bake polymer clay properly is essential to prevent cracking, burning, or fragile pieces.
Tools You Need to Bake Polymer Clay
Before you start baking polymer clay, it helps to prepare the right tools. You do not need expensive equipment, but a few simple items will improve your results.
Essential tools
- Home oven or toaster oven
- Baking tray
- Parchment paper or aluminum foil
- Oven thermometer
- Ceramic tile or baking surface
Optional but helpful tools
- Aluminum foil tent (to prevent burning)
- Cardboard sheet
- Silicone baking mat
Using a dedicated baking surface ensures your clay pieces bake evenly without sticking to the tray.
The Correct Temperature for Baking Polymer Clay
The most important rule when learning how to bake polymer clay is to follow the temperature recommended by the clay manufacturer.
Most polymer clay brands bake at:
110°C – 130°C (230°F – 266°F)
The exact temperature depends on the brand you are using. Always check the packaging instructions.
Why temperature matters
If the temperature is too low:
- The clay may remain soft
- Pieces can break easily
If the temperature is too high:
- The clay can burn
- Dark colors may discolor
- Toxic smoke may appear
Using an oven thermometer is highly recommended because many ovens are not perfectly accurate.
Step-by-Step Guide: How to Bake Polymer Clay
Following the correct baking process will ensure your polymer clay creations are strong and long-lasting.
1. Preheat the oven
Always preheat your oven before placing the clay inside. This ensures the temperature remains stable during the baking process.
Set the oven according to your clay brand instructions.
2. Prepare the baking surface
Place your clay pieces on one of the following:
- Parchment paper
- Ceramic tile
- Aluminum foil
- Silicone baking mat
Avoid placing clay directly on metal trays because it may cause uneven heating.
3. Arrange the clay pieces
Place your creations with enough space between them.
This allows heat to circulate evenly and prevents pieces from touching or sticking together.
4. Bake for the correct amount of time
A common guideline when learning how to bake polymer clay is:
Bake for 15–30 minutes per 6 mm (¼ inch) thickness.
For example:
- Thin charms: about 15 minutes
- Medium sculptures: 25–30 minutes
- Thick pieces: up to 45 minutes
Baking longer at the correct temperature is usually safer than baking too short.
Underbaked clay is one of the most common beginner mistakes.
5. Allow the clay to cool completely
After baking, remove the tray from the oven and let the clay cool naturally.
Polymer clay becomes fully hard only after it cools down.
Do not try to test flexibility while it is still hot, as the clay may appear soft.
Common Mistakes When Baking Polymer Clay
Many beginners damage their creations because of a few simple mistakes. Avoiding these will help you master how to bake polymer clay successfully.
1. Using the wrong temperature
Incorrect temperature is the main cause of:
- Burning
- Cracking
- Weak pieces
Always double-check your oven settings.
2. Not baking long enough
Polymer clay that is underbaked may:
- Snap easily
- Feel brittle
- Break during use
It is better to bake slightly longer than too short.
3. Uneven heating
Ovens often have hot spots.
To avoid this:
- Use an oven thermometer
- Rotate the tray halfway through baking
4. Baking on thin metal trays
Thin trays heat very quickly and may burn the bottom of your clay pieces.
Instead, try baking on:
- Ceramic tiles
- Thick baking sheets
- Cardboard covered with parchment paper
5. Skipping protection for delicate colors
Light colors and white clay can burn easily.
A simple trick is to place a foil tent over the pieces to protect them from direct heat.
How to Know If Polymer Clay Is Fully Baked
One of the biggest questions beginners ask when learning how to bake polymer clay is how to tell if it’s done.
Here are some signs:
✔ The clay feels firm after cooling
✔ It does not crumble when gently bent
✔ Thin parts are slightly flexible but not fragile
If your piece breaks easily, it was likely underbaked.
The good news is that polymer clay can usually be baked again if needed.
Tips for Perfect Polymer Clay Results
To achieve professional-quality pieces, follow these additional tips.
Use an oven thermometer
This small tool can make a huge difference. It ensures your oven stays at the correct temperature throughout baking.
Bake on ceramic tiles
Tiles distribute heat evenly and prevent burning on the bottom.
Many professional artists always bake their polymer clay on tiles.
Protect detailed miniatures
Small details can burn faster.
Cover them lightly with foil to protect the surface.
Sand and polish after baking
After baking and cooling, you can improve the finish by:
- Wet sanding
- Buffing
- Adding varnish or glaze
This creates a smoother and shinier surface.
Creative Projects You Can Make with Polymer Clay
Once you learn how to bake polymer clay, the creative possibilities are endless.
Popular projects include:
- Polymer clay earrings
- Miniature food art
- Fridge magnets
- Keychains
- Figurines
- Dollhouse decorations
For artists who enjoy creating miniatures, polymer clay is one of the best materials because it captures tiny details beautifully.
Final Thoughts
Learning how to bake polymer clay correctly is the key to creating strong, durable, and professional-looking crafts. By using the right temperature, baking for the proper amount of time, and avoiding common mistakes, you can ensure your polymer clay creations turn out perfectly every time.
Whether you’re making jewelry, decorative magnets, or miniature art pieces, mastering the baking process will significantly improve the quality of your work.
With practice, patience, and the right techniques, polymer clay can become one of the most rewarding materials in your creative journey.
So preheat your oven, prepare your tools, and start experimenting—your next beautiful creation is just one bake away!