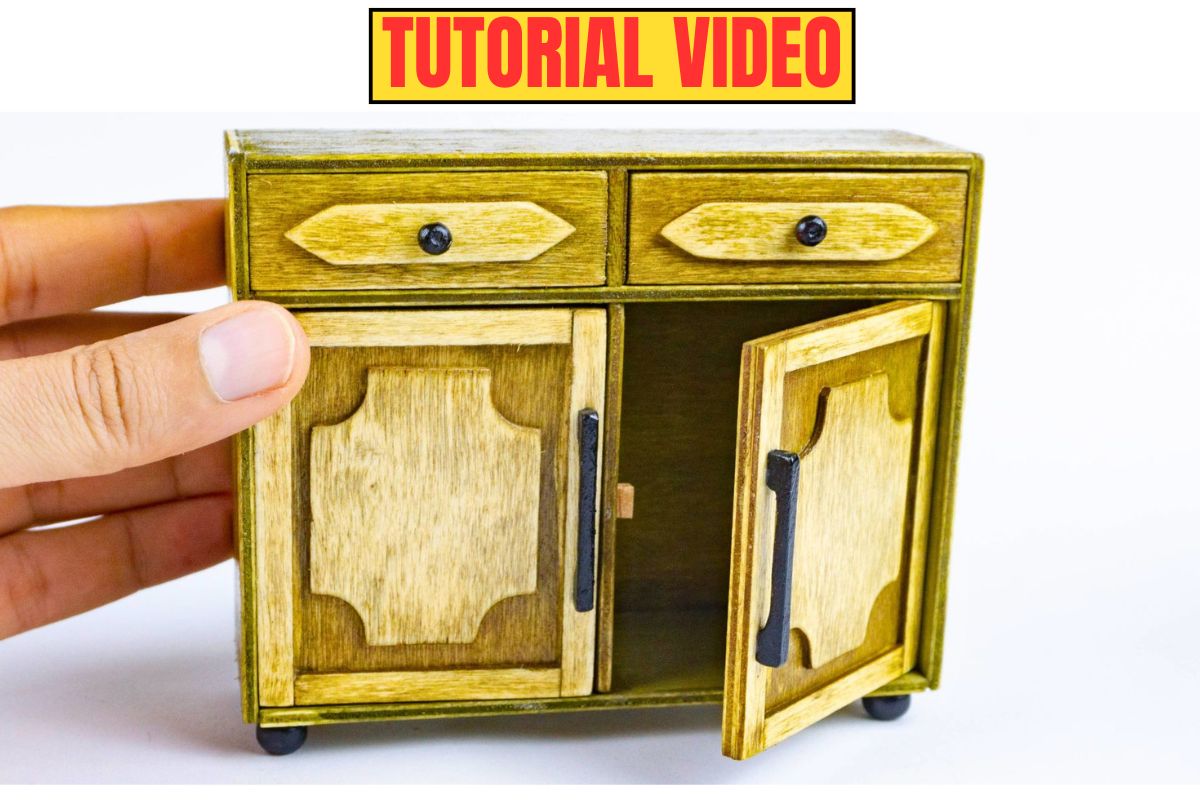
Creating miniature furniture is one of the most rewarding parts of the dollhouse hobby, and today’s project is a perfect example of that joy. In this article, we’ll walk through the process of making a miniature cabinet, a small but charming piece that can bring character to any dollhouse room.
The full step-by-step demonstration will be available in the accompanying video, but here you’ll find the essential tips, tools, and safety notes you need before you start.
I rely on a set of trusted tools that help achieve professional-looking results in miniature woodworking:
- Sandpaper – to smooth edges and prepare surfaces.
- Transparent brown stain – to bring out the natural beauty of the wood grain.
- Wood oil – to protect and enhance the finish.
- Jeweler’s saw – for delicate and precise cuts.
- Small table saw – to speed up straight cuts.
- 12V mini sander – for quick, clean smoothing.
Miniature woodworking doesn’t have to be complicated, especially when you choose the right materials. For this project, I used 3 mm plywood, which is one of the best options for beginners. It’s thin enough to cut easily but strong enough to hold its shape. Because of its smooth surface and light weight, it’s ideal for crafting small furniture pieces like cabinets, drawers, and shelves.
One of the most important steps before you start cutting is preparing your design on paper. If you’re a beginner, sketching your idea on a sheet of paper will help you visualize the final form and avoid mistakes later. This approach may seem simple, but it greatly improves your precision. It also allows you to calculate the measurements more confidently, ensuring all your cabinet parts fit together perfectly.
Once the design is ready, you can transfer your measurements onto the plywood. Accuracy is crucial here, so use a sharp pencil and a metal ruler. Clear lines will help guide your saw and reduce errors. Even small deviations can affect the final alignment, so take your time with this step.
When it comes to cutting the wood, always prioritize safety. Miniature-making might look harmless, but you still work with sharp tools that require attention. Whether you use a craft knife, a hand saw, or a precision tool, safety comes first. Make sure your hands are positioned safely, your workspace is stable, and you’re fully focused on the task. A small slip can result in injury, so patience and caution are essential.
After cutting the pieces, test the fit before applying any glue. This “dry assembly” step helps you confirm that all sides meet correctly and that your cabinet stands straight. If anything looks uneven, you can sand or adjust it before committing to glue.
For the assembly, white wood glue is more than enough. It holds well and dries clean. Apply a small amount to avoid excess glue leaking at the joints. Press the pieces together and let them dry completely before moving to the next step.
Now comes one of the most enjoyable parts: painting the miniature cabinet. For this project, I chose a beautiful shade of green. It’s a color that gives the piece life and makes it stand out in a dollhouse setting. But the real magic happened after painting—once the color dried, I gently sanded the surface.
Sanding the painted surface may seem unusual, but the effect is stunning. By lightly rubbing the paint, you create soft variations in tone and texture. The result is a charming, worn look that gives the cabinet a realistic and handcrafted appearance. This technique is excellent if you want your furniture to look vintage or naturally aged.
After finishing the sanding, you can add extra details such as miniature knobs, small decorative carvings, or a thin coat of clear varnish. These touches elevate the design and make your miniature look even more professional. Don’t be afraid to experiment—miniature furniture is all about creativity and discovering what works best for your style.
If you’re new to the world of miniatures, this project is a fantastic place to start. It teaches you basic woodworking skills, introduces you to painting techniques, and gives you a finished piece you can proudly display. Plus, working on small furniture brings a sense of calm and focus that many miniature artists truly enjoy.
The full tutorial is available in video form, where I demonstrate every step clearly and in detail. Watching the process will help you understand the cutting angles, the assembly method, and the final finishing touches. I highly recommend watching it before starting your cabinet, especially if you’re a beginner.
Before we wrap up, I want to thank all my followers for their continuous support. Your comments, encouragement, and enthusiasm inspire me to create more miniature projects every week. I hope you enjoy today’s tutorial as much as I enjoyed making it
Enjoy the video, and happy crafting!