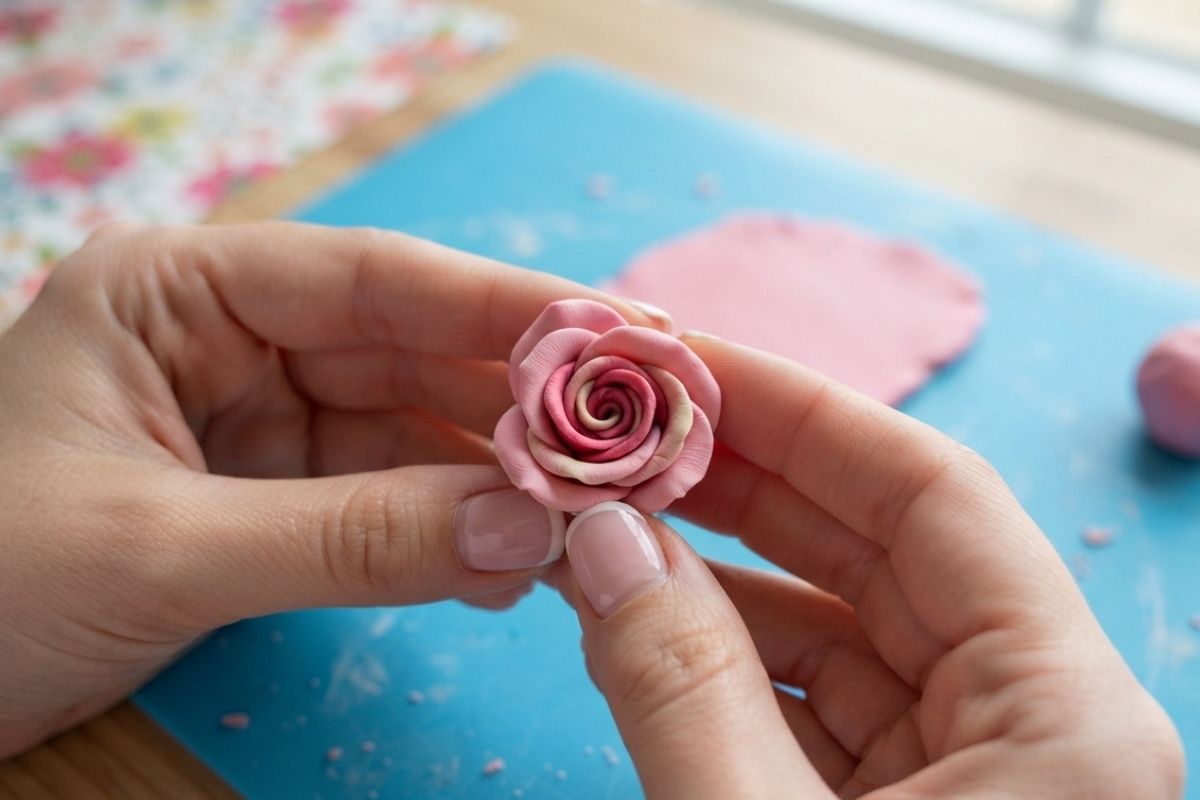
Clay roses are one of the most rewarding projects a beginner can try. They look intricate and delicate, but the technique behind them is surprisingly simple once you understand the basic petal-and-roll method. Whether you want to make a single rose for a ring dish, a bouquet for a keychain, or a set of clay flower earrings, this step-by-step guide will walk you through everything you need to know to create a beautiful polymer clay rose from scratch.
For the best understanding, we recommend reading the information first before watching the video. Prefer a visual guide?
Materials You’ll Need
Before you start, gather these basic supplies:
- Polymer clay in your chosen rose color (classic red, soft pink, cream, or even pastel shades work beautifully)
- A clay roller or acrylic rod to flatten the clay evenly
- A ball stylus or toothpick for shaping and adding texture to the petals
- A cutting tool or craft knife to trim excess clay
- A ceramic tile or glass surface to work on
- An oven for baking and curing the finished piece (check your clay brand’s instructions for temperature and time)
- Optional: floral wire or a jump ring if you plan to turn your rose into jewelry or a stem-mounted flower
Step-by-Step Instructions
1. Condition the Clay
Start by kneading your clay in your hands for a few minutes until it becomes soft, warm, and pliable. This step is essential — clay that isn’t properly conditioned can crack once baked.
2. Roll Out Thin Petal Shapes
Take a small ball of clay, about the size of a pea, and flatten it between your fingers or with a roller until it’s thin — roughly 1-2 mm thick. Shape it into a small oval or teardrop. This will be your center petal.
3. Form the Center Bud
Roll the first petal tightly around itself to form a small, tight coil. This becomes the center bud of your rose, so keep it compact and neat.
4. Add Petals One by One
Flatten a few more small ovals, slightly larger than the first. Wrap each one around the center bud, slightly overlapping the previous petal and curling the top edge outward with your fingers or a ball stylus for a natural, realistic look. Continue adding petals, making each one a little bigger than the last, until your rose reaches the size you want.
5. Shape the Outer Petals
For the outermost layer, gently press the edges of each petal outward and curve them backward, just like a real rose in full bloom. Use a ball stylus to add subtle creases and thin the petal edges for extra realism.
6. Trim the Base
Once you’re happy with the shape, use your cutting tool to trim any excess clay from the bottom of the rose so it sits flat and neat.
7. Bake and Cool
Place your finished rose on a baking tray and bake according to your clay brand’s instructions (most polymer clays bake at low temperatures for around 15-30 minutes). Let it cool completely before handling, as the clay is fragile until it hardens.
Helpful Tips for Beginners
- Keep your hands and tools clean between colors to avoid muddy or smudged petals.
- Work slowly with the first few petals — the center bud sets the tone for the whole flower, so take your time getting it tight and even.
- Vary the petal size gradually rather than jumping from very small to very large; this creates a more natural, blooming look.
- Chill your clay for a few minutes if it becomes too soft or sticky to shape properly.
- Practice with scrap clay first if you’re nervous about wasting your good clay while learning the coiling technique.
Final Thoughts
Making a rose out of clay is a wonderful beginner project that teaches core polymer clay skills like conditioning, layering, and shaping — techniques you’ll use again and again in future projects. With a little patience, your first clay rose might not be perfect, but each one you make will look more refined than the last. Once you’ve mastered the basic rose, you can experiment with different color combinations, petal counts, and sizes to create a whole garden of handmade clay flowers.