Handmade clay magnets are one of the most popular DIY craft projects today. They are fun to create, easy for beginners, and perfect for decorating refrigerators, whiteboards, or magnetic surfaces. Many crafters enjoy making clay magnets using air-dry clay or polymer clay because the materials are affordable and the possibilities for design are endless.
| Product | Buy |
|---|---|
| Air Dry Clay |

|
| Clay Tools |
|
| Clay Shaper Tool |
|
| Magnets |
|
| Jewellery Materials |
|
| Acrylic Colours |
|
| Paint Brushes |
|
However, after spending time shaping, painting, and decorating your magnets, protecting them becomes essential. Without proper sealing, colors may fade, dust can stick to the surface, and the clay may absorb moisture over time.
Applying a glossy protective layer not only preserves the beauty of your clay magnets, but also makes them look more professional and durable. In this guide, you will learn how to protect your handmade magnets with a glossy coating that lasts for years.
Why Clay Magnets Need a Protective Coating
Many beginners overlook the importance of sealing their crafts. But clay, especially air-dry clay, can be porous and sensitive to humidity.
Adding a glossy finish offers several benefits:
- Protects paint and colors from fading or scratching
- Prevents moisture damage and dust buildup
- Enhances colors by giving them a vibrant shine
- Improves durability, making magnets last longer
- Creates a professional look similar to store-bought products
If you plan to sell handmade crafts or share them on social media, a glossy finish can significantly improve the final appearance of your clay magnets.
Materials You Need
Before applying the protective layer, gather the following materials:
- Clear glossy varnish or acrylic sealer
- Small soft brush or foam brush
- Fully dried and painted clay magnets
- Clean working surface
- Optional: resin or UV resin for an ultra-gloss finish
Choosing the right sealer depends on the type of clay you used. Acrylic varnish works well for both air-dry and polymer clay projects.
Step-by-Step Guide to Sealing Clay Magnets
1. Make Sure the Clay is Completely Dry
Before sealing your clay magnets, ensure that the clay and paint are fully dry. This is especially important for air-dry clay, which may take 24–48 hours to cure completely.
Applying varnish too early can trap moisture and damage the surface.
2. Clean the Surface
Dust or small particles can ruin the glossy finish. Use a soft cloth or brush to gently clean the surface of your magnets before applying the coating.
A clean surface ensures the varnish spreads evenly.
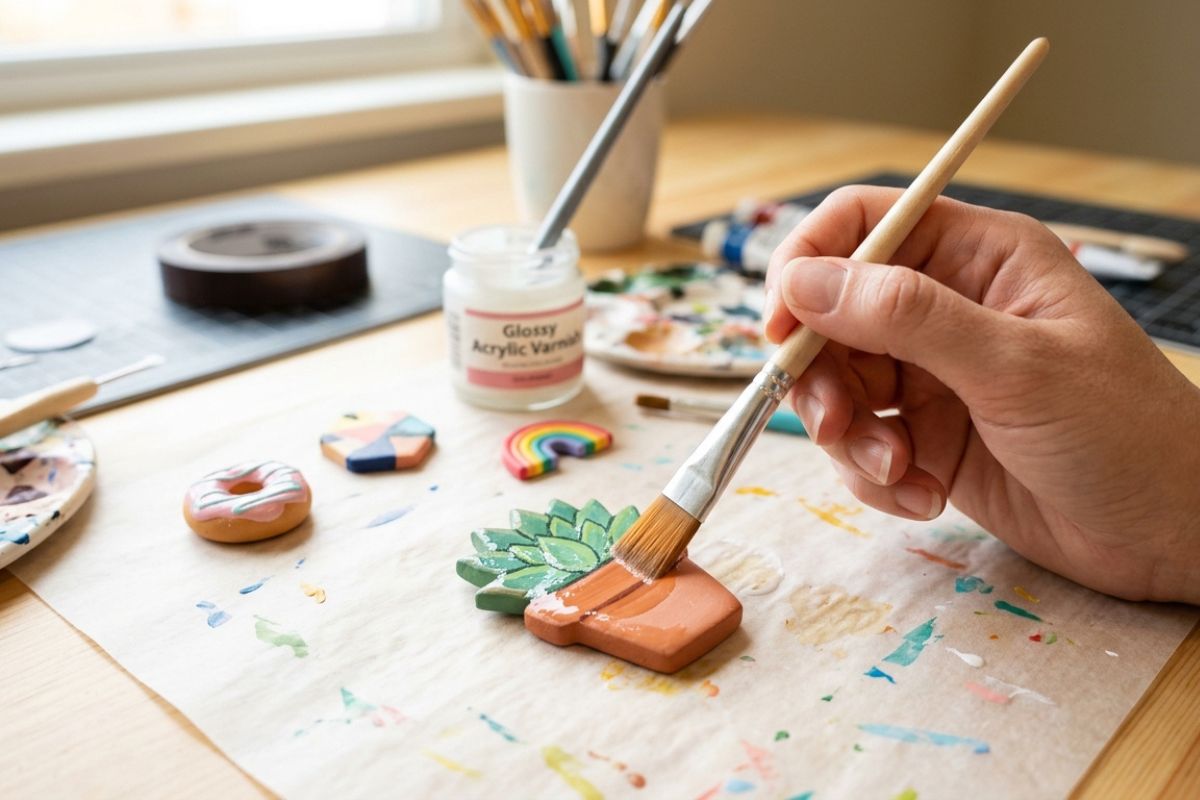
3. Apply a Thin First Layer
Dip your brush lightly into the glossy varnish and apply a thin, even layer across the surface of the magnet.
Tips for best results:
- Use smooth brush strokes
- Avoid applying too much product
- Cover all painted areas evenly
Let the first layer dry completely according to the product instructions (usually 30 minutes to 1 hour).
4. Add a Second Coat for Extra Protection
For long-lasting clay magnets, a second coat is highly recommended.
The second layer will:
- Increase durability
- Improve shine
- Provide stronger protection against scratches
Allow the magnet to dry again after applying the second coat.
5. Optional: Use Resin for a Glass-Like Finish
If you want a premium glossy effect, you can apply clear resin on top of your clay magnets.
Resin creates:
- A thick glass-like surface
- Strong waterproof protection
- A highly professional appearance
However, resin requires more care and proper curing, so beginners often start with acrylic varnish first.
Tips for a Perfect Glossy Finish
To get the best results when sealing clay magnets, keep these tips in mind:
- Always apply multiple thin layers instead of one thick layer
- Work in a dust-free area
- Let each coat dry fully before applying the next
- Use high-quality varnish for better durability
- Avoid touching the surface while it dries
These small details make a big difference in the final look of your magnets.
Common Mistakes to Avoid
Even simple craft steps can lead to problems if done incorrectly. Here are some common mistakes when sealing clay magnets:
Applying varnish on wet paint
This can cause smudging or uneven surfaces.
Using too much varnish
Thick layers may create bubbles or sticky finishes.
Not sealing the entire surface
Leaving areas unprotected can lead to damage over time.
Avoiding these mistakes will help your magnets stay beautiful and durable.
Final Thoughts
Protecting your handmade clay magnets with a glossy coating is a simple step that dramatically improves their quality and lifespan. Whether you use acrylic varnish or resin, sealing your crafts helps preserve colors, prevents damage, and gives your creations a polished professional look.
If you enjoy making DIY magnets, adding this finishing touch will elevate your projects and make them perfect for gifts, decoration, or even selling online.
With the right materials and a little patience, your clay magnets can remain shiny, durable, and eye-catching for years to come.