DIY clay magnets are a fun and creative way to personalize your refrigerator while enjoying a relaxing craft project. Whether you are a beginner in the world of handmade crafts or someone who already loves DIY projects, making DIY clay magnets is simple, affordable, and highly customizable.
With just a few materials, you can create beautiful fridge decorations that add personality and charm to your kitchen.
In this guide, you will learn everything you need to know about making DIY clay magnets for your fridge—from choosing the right clay to shaping, baking, painting, and attaching magnets.
Why Make DIY Clay Magnets?
Creating DIY clay magnets is more than just a craft activity. It offers several benefits:
1. Personalization
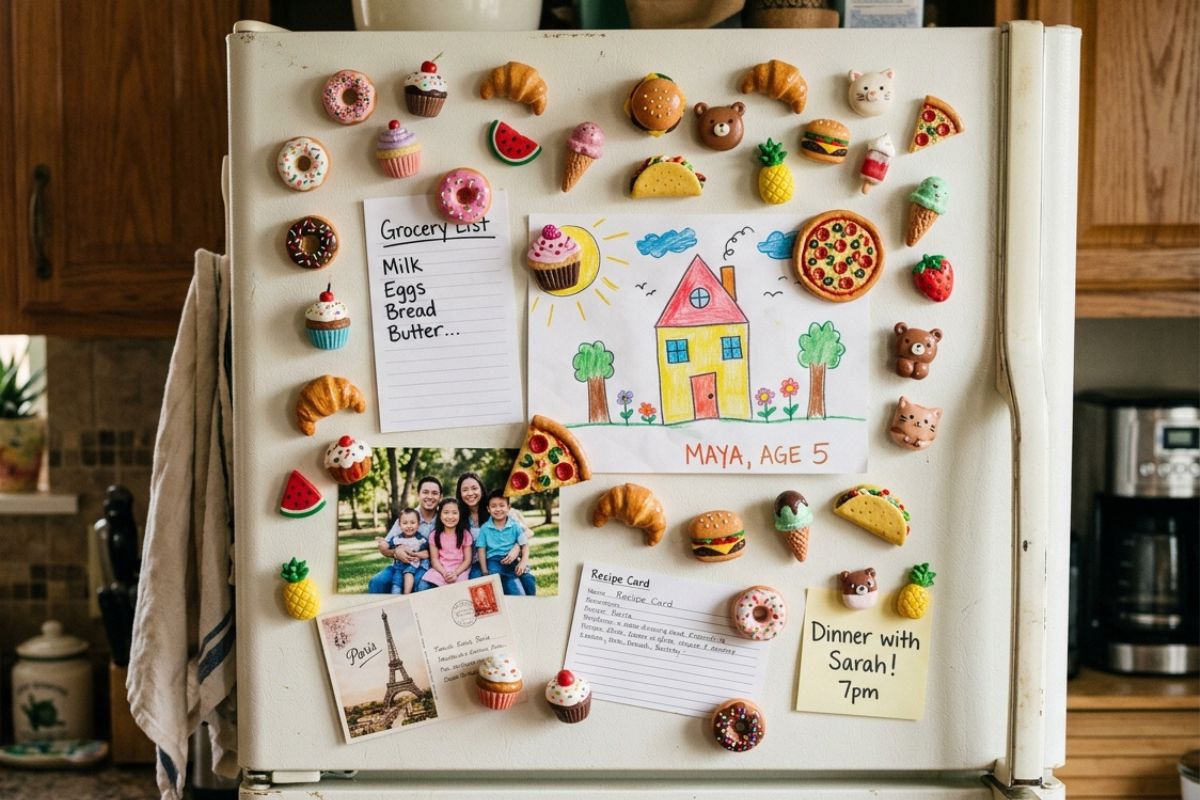
Handmade clay magnets allow you to design unique fridge decorations that match your style. You can create fruits, animals, flowers, mini foods, or abstract designs.
2. Budget-Friendly Craft
Compared to buying decorative fridge magnets, making your own clay magnets is very affordable. A single pack of clay can produce many magnets.
3. Perfect Gift Idea
DIY clay magnets make wonderful handmade gifts for friends and family. Personalized magnets can also be great souvenirs or holiday gifts.
4. Relaxing Hobby
Working with clay is calming and enjoyable. Many people find crafting with clay to be a great way to reduce stress and boost creativity.
Materials Needed for DIY Clay Magnets
Before starting your project, gather the following materials:
- Air-dry clay or polymer clay
- Small magnets
- Craft glue or strong adhesive
- Acrylic paint
- Paintbrushes
- Rolling pin (optional)
- Clay shaping tools or toothpicks
- Clear varnish (optional for protection)
Most of these materials are inexpensive and easy to find in craft stores or online.
Step 1: Choose the Right Clay
The first step in making DIY clay magnets is selecting the right type of clay.
Air-Dry Clay
This clay dries naturally in the air and does not require baking. It is beginner-friendly and easy to use.
Polymer Clay
Polymer clay requires baking in an oven to harden. It is stronger and more durable, making it ideal for long-lasting fridge magnets.
Both types work well, so choose the one that best suits your crafting setup.
Step 2: Shape Your Clay Designs
Once you have your clay ready, it’s time to create your designs.
Start by rolling the clay into small balls or flattening it with a rolling pin. Then shape the clay into fun designs such as:
- Mini fruits (strawberries, lemons, oranges)
- Cute animals
- Tiny plants or leaves
- Miniature foods (donuts, pizza, cupcakes)
- Simple geometric shapes
Use clay tools, toothpicks, or even household items to add texture and details.
If you enjoy miniature crafts, this step is especially fun because you can experiment with tiny realistic designs.
Step 3: Let the Clay Dry or Bake It
After shaping your magnets, the clay needs to harden.
For Air-Dry Clay:
Leave the pieces in a dry place for 24–48 hours until they are fully hardened.
For Polymer Clay:
Bake them in the oven according to the instructions on the clay packaging. Usually, polymer clay is baked at a low temperature for about 15–30 minutes.
Allow the pieces to cool completely before moving to the next step.
Step 4: Paint Your Clay Magnets
Painting is where your DIY clay magnets truly come to life.
Use acrylic paints to add colors and details to your designs. For example:
- Paint strawberries red with tiny white seeds
- Add icing details to mini donut magnets
- Use soft pastel colors for cute decorative magnets
You can also blend colors, add shadows, or create patterns for a more realistic or artistic effect.
Let the paint dry completely before continuing.
Step 5: Seal the Magnets (Optional)
To make your clay magnets more durable and shiny, you can apply a clear varnish or sealant.
This step helps protect the paint from scratches and gives the magnets a professional finish.
Apply a thin coat with a brush and allow it to dry completely.
Step 6: Attach the Magnets
The final step is attaching the magnets to the back of your clay creations.
- Apply a small amount of strong craft glue.
- Press the magnet firmly onto the back of the clay piece.
- Allow the glue to dry according to the instructions.
Once the glue is fully dry, your DIY clay magnets are ready to use.
Place them on your fridge to hold notes, photos, or grocery lists.
Creative Ideas for Clay Fridge Magnets
If you want inspiration for your next project, here are some creative ideas:
- Mini fruit collection (apple, banana, watermelon)
- Animal magnets for a cute kitchen theme
- Seasonal magnets for holidays like Christmas or Halloween
- Mini food magnets like burgers, sushi, or cupcakes
- Personalized name magnets
You can even create themed sets to decorate your kitchen throughout the year.
Tips for Perfect DIY Clay Magnets
To get the best results, keep these tips in mind:
- Keep your clay thickness even so magnets stick well.
- Use strong magnets to ensure they hold items on the fridge.
- Work on a clean surface to prevent dust from sticking to the clay.
- Start with simple shapes if you are a beginner.
With practice, your designs will become more detailed and professional.
I recently came across a creator who seems very skilled and professional at making clay fridge magnets. Their techniques and creative designs are truly inspiring. If you are looking for new ideas or want to improve your DIY clay magnet projects, watching their video can be very helpful.
Conclusion
DIY clay magnets are a simple and rewarding craft project that anyone can enjoy. With just a few materials and a little creativity, you can transform clay into charming fridge decorations that brighten your kitchen.
Whether you prefer cute animals, miniature foods, or colorful shapes, making DIY clay magnets allows you to express your creativity while creating useful and beautiful handmade items.
Start experimenting with your own designs today, and soon your refrigerator will be filled with unique handmade magnets that reflect your personal style.