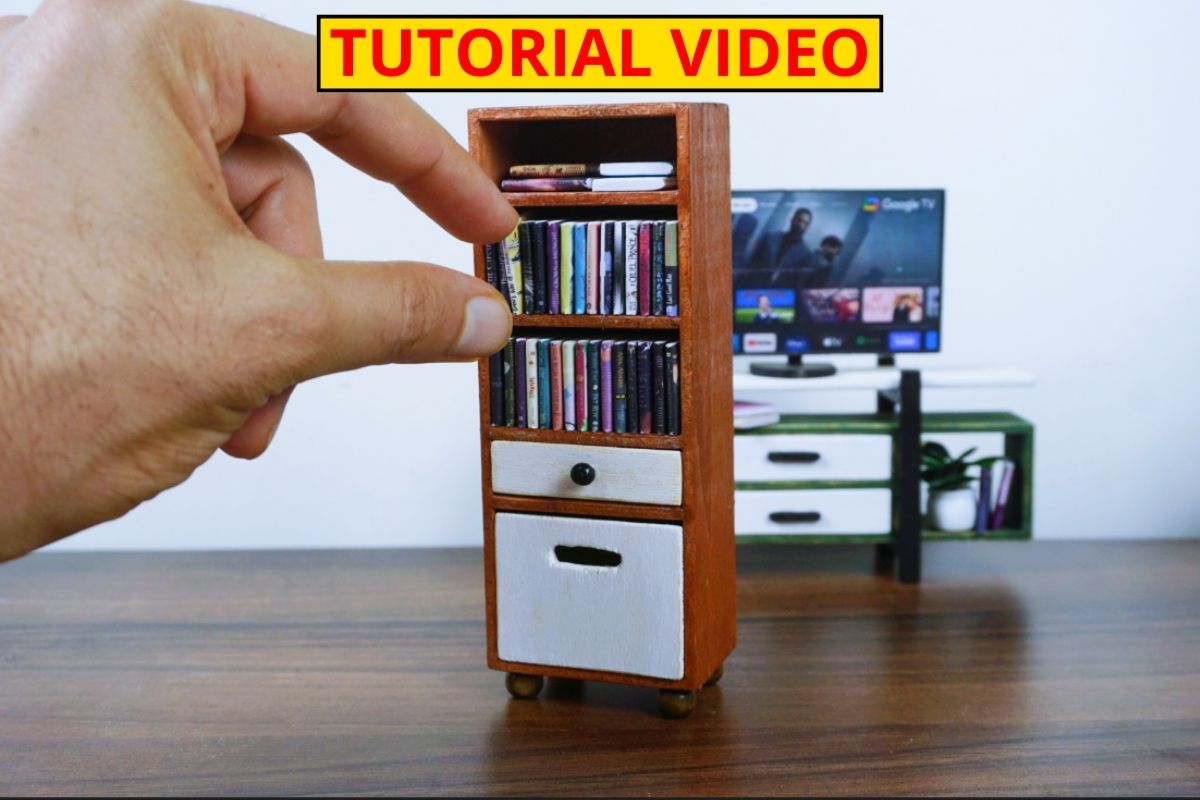
Creating a miniature bookshelf for your dollhouse is a fun and rewarding DIY project. I made mine in 1:12 scale, which is the most popular size for dollhouse furniture. For this build, I used 3 mm plywood, which is lightweight yet strong enough to hold tiny books and accessories.
I rely on a set of trusted tools that help achieve professional-looking results in miniature woodworking:
- Sandpaper – to smooth edges and prepare surfaces.
- Transparent brown stain – to bring out the natural beauty of the wood grain.
- Wood oil – to protect and enhance the finish.
- Jeweler’s saw – for delicate and precise cuts.
- Small table saw – to speed up straight cuts.
- 12V mini sander – for quick, clean smoothing.
The first step was cutting the wood pieces. I used a mini table saw to get precise cuts for the sides, top, and shelves. After cutting, I made sure to sand every edge carefully. This step is very important to achieve a smooth finish and professional look.
For the finish, I applied a brown wood stain mixed with a little water to highlight the natural texture of the plywood. Once it dried, I used a water-based varnish to give the bookshelf a polished and shiny appearance. This combination not only protects the wood but also makes the piece look more realistic.
If you want to follow along, I have uploaded a detailed step-by-step video tutorial showing the entire process. You’ll find it very easy to recreate this project even if you are just starting with miniatures.
In the photos, you might also notice the miniature table and TV. You can learn how to make them too—just visit my website where I cover all the topics that will help you build your very first miniature furniture collection.
Making a bookshelf is just the beginning. With the right tools and a bit of patience, you can create a complete dollhouse filled with unique and charming furniture pieces.